Do you remember your first few hours with QuickBooks Online? Unless you went through a structured training course, you may have just poked around until you figured out how to connect your bank accounts and create invoices and sales receipts and record payments.
If you didn’t thoroughly explore the Account and Settings pages, though, you may be missing out on some of the capabilities and options that QuickBooks Online offers.
No one uses 100% of the features found in any online application. But it would be unfortunate if you weren’t taking advantage of all of the flexibility and functionality that QuickBoo0ks Online offers.
All In One Menu
You’ll be able to find all of the options we’ll discuss here by clicking the gear icon in the upper right and selecting Account and Settings under Your Company. This page is divided into several sections, divided by tabs on the left side of the page.
Add or Delete Fields In Sales Forms
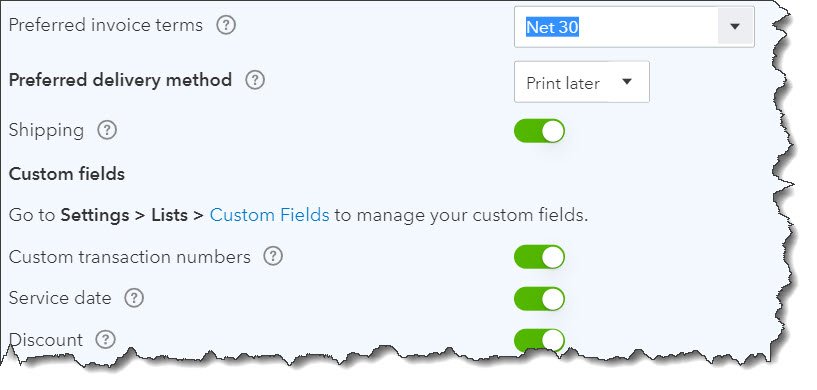
Start by clicking Sales. Under Sales form content, you’ll see several options related to the look and content of your sales forms (like invoices). To edit these, click the pencil icon in the upper right corner of that section.
QuickBooks Online offers several options related to the content of your sales forms.
In the image above, you’ll see some of your options here. You can turn them on and off by clicking the buttons to their right. Green means the preference or field is turned on. You can change these at any time, but keep in mind that your modifications will only apply to future transactions. If you have questions about a particular entry, click the question mark icon to get a brief explanation.
If you want to add custom fields to your forms, click that hyperlink to go to the Custom fields page and click Add field.
Pay Bills and Record Expenses
Click the Expenses tab. Most of the options here are grouped under Bills and Expenses. The rest have to do with purchase orders, which you may or may not have in your version of QuickBooks Online. Tracking purchase orders is a complicated process. We can help you get started with these if you need them.
ome of these concepts, like treating billable expenses and items as income, are complicated. We can explain how this works.
Some of the options in the image above are self-explanatory, like including a Product/Service table on transactions so you can itemize what you sell. Sales tax (not shown here) and billable expenses are more complicated. Let us help you get these tools right from the start.
Track Time
Click the Time tab. The questions here are simple. Do you want your sales forms to display a field for services rendered? Should you be able to designate time as billable? Do you want users who are entering their time to see the billable rate (usually not a good idea)?
Advanced Settings
There’s a lot in this section, some of which involves basic questions about your preferences for things like date and number format, account numbers, and accounts for shipping, discounts, and markup. QuickBooks Online’s default settings may be fine, or you may want to alter them. You may also have already established some of these settings, like the first month of your fiscal year and your accounting method.
Warning: If you’re uncertain about the difference between cash and accrual and don’t know which one you should be using, contact us soon. It’s important.
There are two sections here, though, that you should definitely visit:
Do you want QuickBooks Online to take some actions automatically?
Automation. QuickBooks Online can take some actions automatically, but consider carefully whether you want it to do so. For example, should unbilled activity be automatically invoiced? Should credits be applied automatically?
Categories. You can request that fields be added to transactions for Classes and Locations. This helps you assign transactions to different segments like departments, locations, and product or service lines.
Reading through QuickBooks Online’s Settings pages may alert you to preferences, capabilities, and features that you didn’t know about. It can also make your accounting data more accurate and useful. If you have questions about any of these and want to learn more about how they might affect you, let us know. We can set up a time to go over them and address any other questions you might have about QuickBooks Online.


